
Build long-lasting asphalt by starting with well-compacted, non-organic subgrade and a stable, well-drained aggregate base. Choose a mix and binder suited to your traffic and climate, and place it at the correct temperature and lift thickness. Compact thoroughly, paying close attention to joints, edges, and smooth tie-ins. Design effective surface and subsurface drainage, then protect your investment with timely crack sealing and sealcoating. Next, you’ll see how each step fits into a practical paving plan.
Key Takeaways
- Start with properly tested, well-compacted subgrade and base using well-graded aggregates, geotextiles where needed, and designed drainage to keep water away from the pavement.
- Select asphalt mix and binder to match traffic loads and climate, using modifiers or recycled content where they improve rutting and cracking resistance.
- Place asphalt at correct temperatures with coordinated trucking and paving operations to avoid cold spots, segregation, and unnecessary stops in the paving train.
- Compact each lift with a disciplined rolling pattern, matching lift thickness to aggregate size and verifying density continuously with gauges or cores.
- Build tight, well-bonded joints and smooth transitions, checking cross-slope, smoothness, and texture, then maintain the surface with regular cleaning, sealing, and timely repairs.
Understanding Soil and Subgrade Conditions
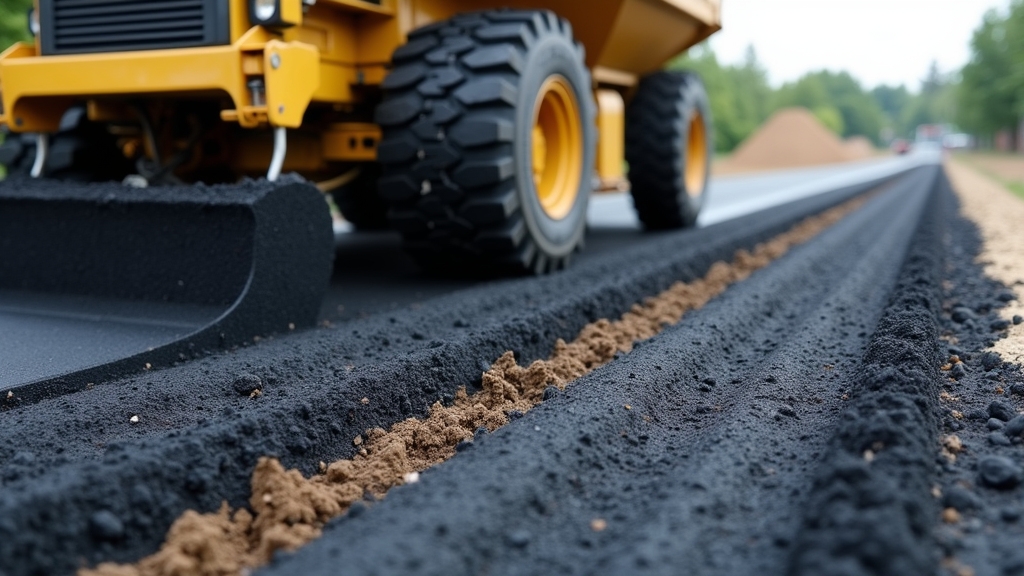
Recognizing how soil and subgrade conditions affect asphalt performance is essential before any paving begins.
You’re not just covering the ground; you’re building on it.
First, you evaluate soil type—clays, silts, sands, or gravels—because each reacts differently to load and moisture.
Weak, highly plastic clays often deform, while well-graded aggregates support traffic better.
You then look at density and bearing capacity using field tests to see how much load the subgrade can safely carry.
Ignoring low strength leads to rutting, cracking, and premature failures.
Moisture behavior also matters.
You assess how water moves through and stays in the soil, since repeated wetting and drying cycles weaken the support.
Soil microbiology can influence organic content and long-term stability, especially in topsoils that shouldn’t stay in the structural section.
A contamination assessment identifies petroleum, salts, or debris that could interfere with bonding and durability of your asphalt layers.
Designing a Stable and Well-Drained Base
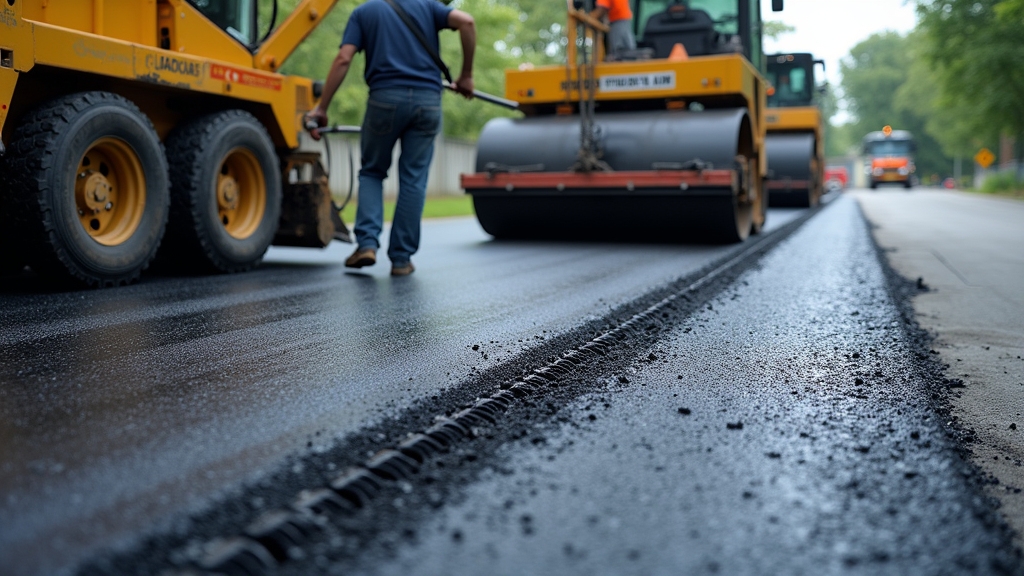
Although the subgrade sets the stage, the base layer does the heavy lifting in carrying traffic and shedding water.
A strong, well-drained base layer is the real workhorse, bearing loads and steering water away.
You build it with well-graded aggregates, compacted in thin lifts so they lock together and resist deformation.
Proper compaction also limits water paths, which reduces freeze–thaw damage and surface cracking.
Start by evaluating drainage.
If water can’t leave the base quickly, you’ll get rutting and potholes.
Use slight crowns or cross-slopes and, when needed, edge drains so water moves away from the pavement structure.
Where soils are weak or easily saturated, Geotextile installation helps separate base stone from subgrade, preventing contamination and loss of strength.
In cold climates, plan for Frost protection.
That can mean thicker base, non-frost-susceptible aggregates, and strict moisture control before compaction.
Selecting the Right Asphalt Mix for the Project
The asphalt mix you choose ultimately determines how well your pavement handles traffic, weather, and time.
You’ll match the mix to expected loads, local climate, and your budget.
For heavy trucks or bus lanes, you need a stiffer, high‑strength mix; for driveways or light‑use parking lots, a standard dense‑graded mix often works.
Pay close attention to aggregate size and gradation.
Larger stone improves load‑carrying capacity, while well-graded blends reduce voids and increase stability.
Ask your contractor to explain why they’re recommending a specific gradation.
Binder selection matters just as much.
In colder regions, you’ll want a binder that resists cracking; in hot climates, one that resists rutting.
Performance modifiers such as polymers, fibers, or rubber can boost resistance to deformation and fatigue.
Finally, evaluate recycled content, like reclaimed asphalt pavement (RAP) or shingles.
When properly designed, these can cut costs and environmental impact without sacrificing performance.
Ensuring Proper Asphalt Temperature and Delivery
Getting asphalt to the jobsite at the right temperature is just as critical as choosing the right mix. You need to control heat loss from the plant to the paver so the mat compacts uniformly and bonds properly. Use insulated trucks, cover loads, and minimize haul time to keep temperatures within the specified range.
Temperature profiling lets you verify consistency across each truckload and through the entire train of trucks. By checking temperatures at multiple points—top, middle, and bottom of the load—you catch cold spots before they hit the screed.
Load sequencing matters just as much. You should schedule trucks so they arrive in a steady rhythm, preventing long gaps or overcrowding at the paver.
| Focus Area | What You Do | Why It Matters |
| Temperature profiling | Measure temps in each load | Avoid cold spots and segregation |
| Load sequencing | Time truck arrivals | Maintain continuous paving operations |
| Delivery coordination | Align plant, haul, and crew schedules | Reduce delays and temperature drop |
Best Practices for Layering and Lift Thickness
Even with the right mix and temperature, your pavement will only perform as designed if you place it in the correct number of layers and at proper lift thicknesses. You should think of the structure from the subbase up: a stable, well‑compacted base, an intermediate binder course, and a smoother surface course.
For driveways and parking lots, you’ll typically use thicker lower lifts for strength and thinner top lifts for appearance and ride.
Match each lift’s thickness to aggregate size; a common guideline is at least three times the nominal maximum aggregate. If lifts are too thin, they cool too fast and may segregate; if they’re too thick, they can trap flaws and later deform.
Plan your Color Options and Decorative Patterns around this structure. Don’t sacrifice structural thickness for appearance—apply tints, surface treatments, or patterned inlays while preserving required lift thicknesses underneath.
Achieving Optimal Compaction and Density
You can’t achieve a durable asphalt surface without getting compaction and density right.
To do that, you’ll need to use proper rolling sequences that match your mix, layer thickness, and environmental conditions.
You’ll also rely on density testing methods—both in the field and the lab—to confirm the mat meets specified performance standards.
Proper Rolling Sequences
How do crews turn freshly placed asphalt into a dense, durable surface that resists rutting and premature failure?
They follow a disciplined rolling sequence that matches temperature, mix type, and layer thickness.
You start with a breakdown roller immediately behind the paver, while the mat is hottest and most workable.
Then you use intermediate rolling to refine compaction and remove marks, followed by finish rolling to smooth the surface and tighten texture.
Consistent operator training makes certain your team understands rolling speed, overlap patterns, vibration settings, and turning techniques that prevent shoving.
Equally important, equipment maintenance keeps drums clean, vibration systems functioning, and water sprays effective, so the rollers can deliver uniform pressure and contact, producing reliable density across the entire pavement.
Density Testing Methods
Dialed-in rolling sequences don’t mean much unless the mat actually reaches the target density, so contractors rely on proven testing methods to verify compaction.
You’ll typically use nuclear density gauges, non-nuclear gauges, or core sampling to measure in-place density.
Each method demands strict calibration procedures so your readings match the mix design’s target values.
On site, you’ll test early and often, adjusting roller passes, speeds, and vibration settings as results come in.
Digital logging of each test location, time, temperature, and reading lets you track trends across the project and quickly spot weak areas.
When you compare field results to lab-derived maximum density, you can confirm you’re consistently hitting the specified compaction window.
Managing Joints, Edges, and Transitions
When you manage joints, edges, and connections correctly, you prevent weak spots that lead to early cracking and raveling.
You’ll need to control how you build and compact joints and edges so they lock together tightly and resist traffic and water.
You also must plan smooth connections between lanes, patches, and existing pavement so drivers experience a uniform, safe surface.
Proper Joint Construction
Although it’s easy to focus only on smooth mat appearance, the long-term performance of an asphalt surface depends heavily on how well you build its joints, edges, and junctions.
You need tight, well-bonded joints that resist water, traffic, and thermal movement.
Plan each paving pass so you minimize the number of joints and align them away from wheel paths when possible.
For longitudinal and transverse joints, you should create a clean, straight face, then tack-coat it so the new hot mix bonds securely.
Always verify sealant compatibility with both the mix and any adjacent materials before you apply it.
- Prepare straight, vertical joint faces
- Apply appropriate tack or joint adhesive
- Check temperatures, alignment, and density continuously
Edge Compaction Techniques
Strong joints only perform well if you compact the edges correctly, because poorly supported sides unravel first under traffic and water. You start by setting the paver to deliver slightly extra material along the edge so the roller can form a dense, well-shaped shoulder. Always roll edges while the mix is still compactable, working from the hot side toward the cold to avoid cracking.
Use a combination of breakdown and finish rolling to eliminate voids at the edges. Consistent Operator Training helps your crew recognize segregation, edge slumping, and over-rolling that can crush aggregate.
Regular Equipment Maintenance keeps drums smooth, vibratory systems responsive, and tires properly inflated, so every pass delivers even pressure and uniform edge density that resists raveling and moisture.
Smooth Surface Transitions
Even a well-compacted mat fails early if joints, edges, and grade changes create bumps, dips, or weak spots in the surface.
To avoid this, you need to treat every cold joint, tie-in, and curb line as a potential failure point and finish it with the same care as the mainline paving.
Use tight stringlines, proper milling, and matched passes so junctions feel seamless for vehicles and enhance pedestrian accessibility and bicycle comfort.
Pay close attention where asphalt meets concrete, utility castings, and existing pavements.
- Overlap and lute longitudinal joints lightly, then compact from the hot side.
- Taper vertical edges and feather overlays to prevent abrupt steps.
- Verify cross-slope and smoothness with straightedges and ride checks.
Drainage Strategies to Prevent Water Damage
Why does a well‑paved asphalt surface still fail if water has nowhere to go? Because trapped moisture seeps into tiny cracks, weakens the base, and freezes, breaking your pavement from the inside out. To prevent that, you design drainage before you place a single ton of mix. Shape the surface with consistent cross‑slope so water flows away quickly, then guide it with gutters, inlets, and properly sized storm sewers. On landscaped edges, vegetated swales slow runoff, filter pollutants, and relieve pressure on underground pipes.
| Drainage Element | Main Purpose | What You Should Check |
| Cross‑slope | Move water off surface | Uniform % slope, no birdbaths |
| Longitudinal grade | Direct flow along lane | Positive slope, no flat sags |
| Gutters/curbs | Capture edge runoff | Clean, well‑aligned, no ponding points |
| Inlets | Transfer water to pipes | Correct spacing, clear grates |
| Outfalls/swales | Discharge water safely | Stable outlets, no erosion or backups |
Surface Finishing and Quality Control Checks
How do you turn freshly placed asphalt into a smooth, durable driving surface that actually meets spec? You start by focusing on surface finishing as soon as compaction ends.
Turn freshly placed asphalt into a smooth, spec‑meeting surface by dialing in finishing immediately after compaction ends
You check straightness with a 10‑foot straightedge, correct high or low spots while the mix is still workable, and make sure joints are tight, well-bonded, and aligned so drivers don’t feel bumps or see visible seams.
Next, you confirm the surface will perform under traffic. That’s where systematic quality control checks matter:
- Conduct texture inspection to verify the surface isn’t too smooth or too open, which affects noise, drainage, and friction.
- Perform skid testing to measure surface friction and confirm braking safety in wet and dry conditions.
- Verify compaction, thickness, and density with cores or non-destructive gauges to guarantee the mat meets design requirements.
Maintenance Techniques to Extend Pavement Life
Planning for maintenance from day one keeps your asphalt performing like new for years instead of failing early and expensively. You extend pavement life by pairing routine pavement cleaning with scheduled preventive inspections so small issues never grow into structural failures. Sweep sand, leaves, and debris regularly; they trap moisture and grind the surface under traffic.
Sealcoating every few years shields the binder from UV rays, oils, and water. You should also seal cracks promptly so water can’t penetrate and weaken the base. When damage appears localized, choose patching instead of full replacement.
| Task Type | Primary Purpose |
| Pavement cleaning | Remove grit, prevent moisture retention |
| Preventive inspections | Catch cracks, raveling, drainage problems |
| Crack sealing/patching | Block water, stop failures from spreading |
Document what you find, then adjust your maintenance schedule based on traffic, climate, and drainage performance.
Frequently Asked Questions
How Does Asphalt Paving Compare Environmentally to Concrete and Other Surfacing Options?
You’ll find asphalt often beats concrete on life cycle emissions when you design, maintain, and recycle it well. You gain recyclability benefits, lower energy use, and easier rehabilitation, though warm-mix technologies and proper drainage further reduce environmental impacts.
What Certifications or Qualifications Should a Professional Asphalt Contractor Have?
You should confirm state License Verification, liability and workers’ comp insurance, manufacturer or DOT certifications, OSHA safety training, and active Continuing Education in paving technology, environmental practices, and quality control to guarantee reliable, long‑lasting asphalt work.
How Long Should Traffic Be Kept off Newly Paved Asphalt Surfaces?
You should keep regular traffic off new asphalt at least 24–48 hours. For heavy trucks, wait 3–7 days. Curing time continues for weeks, so respect load limits and avoid sharp turns, parking, or jacks early.
What Are Typical Costs per Square Foot for Quality Asphalt Paving Projects?
You’ll typically pay $3–$7 per square foot for quality asphalt paving. Regional pricing, material specs, and local labor rates drive the range. Always get multiple detailed quotes so you can compare base preparation, thickness, and warranty.
How Can I Evaluate Bids to Avoid Low-Quality, Cut‑Corner Asphalt Work?
You avoid cut‑corner work by demanding written Material Specifications, thickness, and compaction targets, then comparing them line‑by‑line. Ask about equipment, crew experience, warranty, and insurance, and perform thorough Reference Verification with recent similar projects and site visits.
Final Thoughts
Building durable, long-lasting asphalt surfaces begins with understanding your subgrade, choosing the right mix, and maintaining precise control over temperature and compaction. Paying attention to lift thickness, joints, and edges ensures a pavement that stays tight, smooth, and stable for years to come. Just as importantly, designing proper drainage and performing regular maintenance—likesealcoating andcrack repair—helps protect your investment and keep your surfaces performing at their best.
AtAll Around Asphalt, we bring decades of experience and a reputation for excellence to every project we handle acrossMahwah, NJ. Whether you’re looking for expertresidential asphalt paving,commercial paving solutions, or specialized services likeasphalt resurfacing,driveway paving, orparking lot construction, our skilled team delivers results that stand the test of time. We combine high-quality materials, proven techniques, and meticulous attention to detail to create smooth, reliable, and visually appealing surfaces.
Ready to bring lasting quality to your next asphalt project? ContactAll Around Asphalt today or call 862-283-9101 to schedule your free consultation. Let our experts help you design and build an asphalt surface that’s not only built to perform—but built to last.