Mastering essential asphalt paving techniques is key to creating a durable, attractive surface. Start by choosing the right tools and preparing your site thoroughly. Mix asphalt properly for the best results and maintain a consistent thickness during application. Don’t forget to compact the asphalt well and allow ample curing time. Regularly seal your pavement to protect it from damage. Avoid common mistakes to guarantee a successful project. Stick around to discover more tips and insights for your asphalt journey!
Key Takeaways
- Properly prepare the site by clearing debris and ensuring good drainage to prevent future issues.
- Maintain a consistent asphalt thickness of 2-3 inches for stability and durability.
- Compact the asphalt thoroughly right after installation for a strong foundation.
- Use warm asphalt to improve adhesion and achieve a smooth finish.
- Allow adequate curing time before allowing traffic on the new surface to prevent damage.
Essential Techniques for Asphalt Paving
When tackling asphalt paving at home, mastering essential techniques can make all the difference. Start by understanding the various asphalt types available, such as hot mix and cold mix. Hot mix asphalt is ideal for larger projects due to its durability, while cold mix is perfect for smaller repairs.
Next, focus on your paving techniques. Always prepare the surface by clearing debris and leveling the ground to guarantee a sturdy foundation.
When laying asphalt, use a consistent thickness, typically about two to three inches, and compact it properly for stability.
Don’t forget the importance of temperature; work when the asphalt is warm to achieve better adhesion and a smoother finish.
Finally, allow adequate curing time before driving on your new surface. By following these techniques, you’ll ensure a successful asphalt paving project that stands the test of time.
Choosing the Right Tools for Your Asphalt Project
Selecting the right tools for your asphalt project is just as important as mastering the paving techniques. Start with the basics: a sturdy asphalt rake, a reliable compactor, and a quality trowel are essential for any job.
Choosing the right tools, like a sturdy asphalt rake and reliable compactor, is crucial for a successful paving project.
When it comes to tool selection, consider both your project size and your skill level. For smaller jobs, handheld tools may suffice, while larger projects might require more advanced equipment.
Don’t overlook equipment maintenance, either. Proper care can extend the life of your tools and guarantee they perform well. Regularly check for wear and tear, clean them after use, and store them in a dry place.
This way, you’ll avoid unexpected breakdowns and costly repairs. By investing time in choosing the right tools and maintaining them, you set the stage for a successful asphalt paving project, ensuring a smooth and durable surface for years to come.
Preparing Your Site for Asphalt Installation
Before laying asphalt, you need to guarantee your site is properly prepared to avoid future issues. Start with a thorough site assessment to identify any potential challenges.
Check utility locations to prevent costly damages during installation. Next, consider drainage considerations; proper water flow is essential to maintain your asphalt’s integrity.
Confirm soil stability by testing the ground beneath for compaction and potential issues. If necessary, reinforce weak areas to prevent settling.
Manage vegetation by clearing any plants or roots that could disrupt the surface.
Don’t forget about grading levels; your surface should be graded to direct water away from structures.
Finally, think about access routes for machinery and deliveries—this can save you time and hassle. By addressing these factors, you’ll set a strong foundation for a successful asphalt installation.
Mixing Asphalt for Best Results
When mixing asphalt, selecting quality raw materials is essential for a durable surface.
You also need to maintain proper temperature control to guarantee everything binds correctly.
Finally, achieving ideal mix ratios will help you create a smooth, long-lasting pavement.
Selecting Quality Raw Materials
Choosing the right raw materials is essential for achieving a durable asphalt surface. Start by selecting quality aggregates; they form the backbone of your mix. Look for crushed stone or gravel that meets industry standards, as these materials provide strength and stability.
Don’t overlook asphalt additives—they enhance performance and longevity. Additives can improve flexibility, reduce cracking, and help resist weather damage.
When mixing, guarantee you have the right proportions of aggregates and additives to create a balanced blend. This attention to detail will pay off in the long run, giving you a smooth, resilient surface that can withstand daily wear and tear.
Investing in quality raw materials is key to successful asphalt paving.
Maintaining Proper Temperature Control
Selecting quality raw materials sets the foundation for your asphalt project, but maintaining proper temperature control during mixing is just as essential for achieving ideal results. Effective temperature monitoring guarantees that your asphalt mix remains workable and adheres properly.
| Temperature Range (°F) | Purpose |
| 275-300 | Optimal mixing |
| 250-275 | Suitable for laying |
| 200-250 | Risk of premature cooling |
| Below 200 | Poor compaction |
| Above 300 | Risk of burning |
Keeping an eye on heat retention during mixing is critical. If the temperature drops too low, the asphalt won’t bond well, leading to cracks or premature failure. So, always check your temperatures to assure a successful paving project!
Achieving Ideal Mix Ratios
To achieve the best results in your asphalt paving project, understanding the right mix ratios is essential. You’ll want to focus on the ideal blend of asphalt binder and aggregates, as this directly impacts durability and performance.
Start by exploring different mixing methodologies, such as hot mix or warm mix asphalt, to find what suits your needs best.
Using suitable aggregates—like crushed stone or gravel—guarantees a strong foundation. Aim for a mix ratio of about 5% binder to 95% aggregates for most residential projects.
Step-by-Step Guide to Asphalt Paving
Asphalt paving can seem challenging, but with a clear plan, you can tackle it successfully. Start by evaluating your project budgeting; knowing your costs upfront helps avoid surprises.
Next, prepare the area by clearing debris and marking boundaries. Verify proper drainage to maximize the asphalt benefits, like durability and low maintenance.
Prepare your area by clearing debris and marking boundaries, ensuring proper drainage to enhance asphalt’s durability and low maintenance.
Once the area is ready, lay down a gravel base for stability. After that, heat your asphalt to the recommended temperature and pour it evenly across the surface. Use a screed to level it out, and make sure to work in small sections for better control.
Finally, compact the asphalt using a roller, guaranteeing a smooth finish. Allow it to cure properly before using the surface.
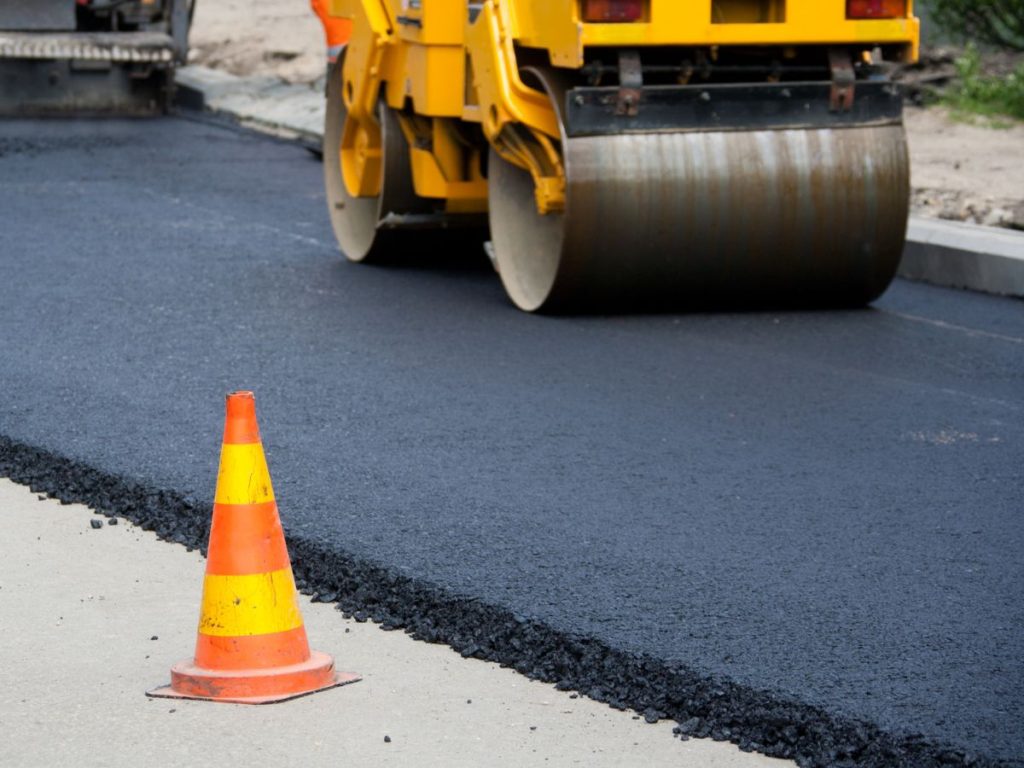
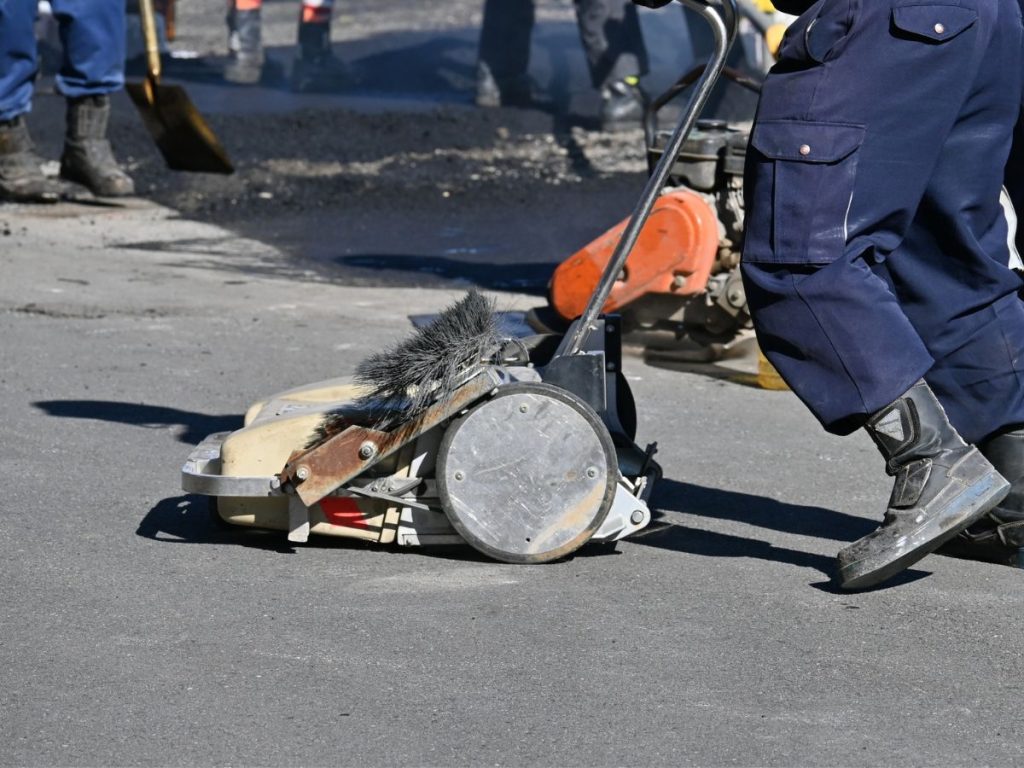
Why Timely Compaction Is Crucial for Durable Asphalt
While you might be enthusiastic to see the finished surface, timely compaction plays a vital role in guaranteeing your asphalt’s durability. Proper compaction methods, like using a roller or plate compactor, help eliminate air pockets and guarantee the asphalt bonds correctly.
If you wait too long after laying the asphalt, it can cool and harden, making it difficult to achieve the density needed for strength and longevity.
Compaction timing is essential; the ideal window is within the first few hours after installation. Delaying this process can lead to cracks and surface imperfections, compromising your investment.
Additionally, well-timed compaction supports a smooth finish and helps manage water drainage effectively.
When and Why to Seal Your Asphalt
After guaranteeing proper compaction of your asphalt, addressing its long-term care is next on the agenda.
Sealing your asphalt is vital for protecting it from damage caused by weather, UV rays, and chemicals. You should seal your asphalt every 2-3 years to maintain its integrity and appearance.
Sealing your asphalt every 2-3 years is essential for protecting it from weather, UV rays, and chemicals, ensuring its integrity and appearance.
There are various sealant types available, including coal tar and asphalt emulsion. Each has its benefits, so choose one based on your specific needs.
For best results, consider using a sealant that’s suitable for your climate.
When applying the sealant, make sure the surface is clean and dry. Use application techniques like a squeegee for small areas or a spray method for larger spaces.
These methods help guarantee even coverage and effective sealing. By sealing your asphalt regularly, you’ll extend its lifespan and keep your driveway looking great for years to come.
Common Mistakes to Avoid During Paving
When paving your driveway, avoiding common mistakes can save you time and money. One major pitfall is making paving miscalculations. Always measure your area accurately; underestimating the size can lead to insufficient materials or an uneven surface.
Additionally, don’t forget to account for drainage. Poor drainage can cause water pooling, leading to cracks over time.
Installation oversights can also derail your project. For instance, skipping the compaction process can result in a weak foundation, making your asphalt prone to damage. Always compact the base layers before laying the asphalt.
Another mistake is rushing the curing process. If you drive on the surface too soon, it can lead to indentations or ruts. Be patient and allow adequate time for the asphalt to set properly.
Maintaining Your Asphalt Surface for Longevity
To keep your asphalt surface in top shape, you need a regular sealcoating schedule.
Don’t wait too long to repair cracks, as they can lead to bigger issues down the road.
With a little maintenance, you can extend the life of your driveway or parking area considerably.
Regular Sealcoating Schedule
A regular sealcoating schedule is essential for maintaining the longevity of your asphalt surface. By applying a sealcoat, you protect against harmful UV rays, water damage, and chemical spills.
The sealcoating benefits include enhanced appearance and increased resistance to wear and tear, which keeps your driveway looking new for years.
To maximize these advantages, aim for a sealcoating frequency of every two to three years, depending on your climate and traffic levels. If you notice fading or minor cracks, it might be time to sealcoat sooner.
Regular maintenance not only extends the life of your asphalt but also saves you money on costly repairs down the line. Keeping a consistent schedule is key to preserving your investment.
Prompt Crack Repair
Promptly repairing cracks in your asphalt is essential for maintaining its integrity and extending its lifespan. Neglecting these issues can lead to larger problems down the road. Start with surface preparation to guarantee a smooth application. Clean the crack thoroughly to remove debris and moisture before applying crack sealing materials.
Here’s a quick guide to help you:
| Step | Description | Tools Needed |
| Surface Preparation | Clean the crack thoroughly | Wire brush, vacuum |
| Crack Sealing | Apply sealing material evenly | Sealant, caulking gun |
| Final Inspection | Check for gaps or missed spots | Visual inspection |
Should You DIY or Hire a Pro for Your Asphalt Project?
Wondering whether to tackle your asphalt project yourself or hire a professional? It’s a common dilemma for homeowners.
If you’re considering the DIY route, think about the cost comparison. While materials might seem affordable, mistakes can lead to costly repairs down the line. Plus, you’ll need to invest in tools and take time off your busy schedule.
On the other hand, hiring a pro might seem pricier upfront, but their expertise guarantees a quality finish. They’ll handle the project timeline efficiently, minimizing disruptions to your daily life.
Professionals come equipped with the right tools and knowledge, saving you the hassle of trial and error.
Ultimately, weigh your skills, budget, and time availability. If you’re confident and have the time, DIY might be rewarding. But if you want peace of mind and a polished result, hiring a pro could be the better choice.
Frequently Asked Questions
How Long Does Asphalt Typically Last Before Needing Replacement?
Asphalt typically lasts 15 to 30 years, depending on factors like climate and usage. By adopting good maintenance practices, you can extend its lifespan, ensuring your driveway or pavement remains in great shape longer.
What Is the Best Temperature for Paving Asphalt?
The best temperature for paving asphalt is between 70°F and 90°F. At this range, asphalt mixing achieves ideal consistency, ensuring proper compaction and durability. Lower temperatures can negatively affect the asphalt’s performance and longevity.
Can I Pave Over Existing Concrete Surfaces?
Yes, you can pave over existing concrete surfaces. Just guarantee proper surface preparation by cleaning and repairing any cracks. Utilizing the right paving methods will help create a durable asphalt layer that adheres well.
How Do Weather Conditions Affect Asphalt Installation?
Weather impacts asphalt installation considerably. Ideal temperatures guarantee proper asphalt curing, while rain or extreme heat can compromise the surface. Always check forecasts to choose the best time for your paving project to assure lasting results.
What Are the Costs Associated With Asphalt Paving Projects?
Asphalt paving costs vary based on several cost factors like materials, labor, and project size. To keep expenses down, follow maintenance tips such as regular sealing and timely repairs, ensuring your investment lasts longer.
Final Thoughts
At All Around Asphalt, we know that using the right asphalt paving techniques is the foundation of a surface that looks better, lasts longer, and performs the way it should. From proper site preparation and mixing to compaction, sealing, and ongoing maintenance, every step plays an important role in protecting your investment and helping you avoid costly problems later on.
If you are planning a new paving project or want expert help maintaining an existing surface, our team is here to provide professional residential asphalt paving, dependable asphalt driveway paving, reliable asphalt repair, and long-lasting asphalt sealcoating. Contact All Around Asphalt today to schedule a consultation and let us help you create a smooth, durable, and professionally finished asphalt surface for your home.