
ADA-compliant parking is nonnegotiable: it protects you from fines and lawsuits, reduces accidents, and boosts reputation. Count all spaces, apply ADA ratios, round up, and make sure at least one van-accessible stall. Place accessible spaces by the main entrance with level aisles, 1:48 max slopes, and aligned curb ramps. Use clear signs at 60 inches minimum height, durable high-contrast striping, and routine audits. Train staff, set specs in contracts, and verify slopes and markings. Here’s how to get it right.
Key Takeaways: ADA Accessible & Van Parking Space CalculationsKey Takeaways
- Calculate required accessible and van spaces from total stalls; round up, verify state overlays, and place van spaces on the shortest accessible route.
- Keep parking and access aisle slopes ≤1:48; ramps ≤1:12; align aisles with curb ramps so users never travel behind vehicles.
- Cluster accessible spaces near the primary entrance, provide continuous 36-inch minimum routes, and ensure 60-inch turning spaces at doors.
- Use durable, high-contrast striping and 60-inch-high signs with ISA; add “Van Accessible” plaques and keep signs clear of snow and overhangs.
- Bake ADA checks into maintenance: quarterly/semiannual audits, slope spot checks, staff training, drainage upkeep, and documented restriping/repairs.
Why ADA Compliance Matters for Parking Lots
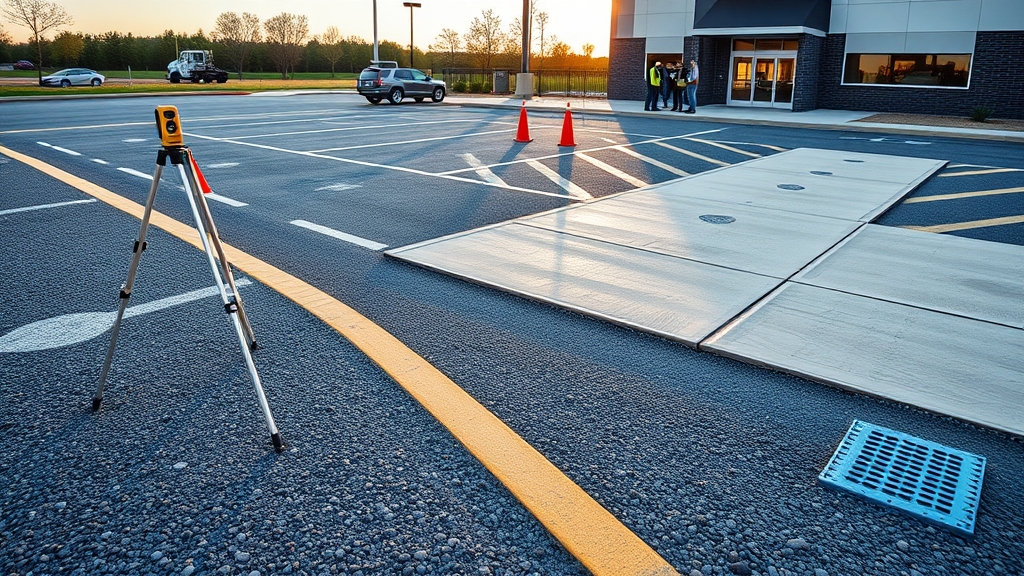
Even before you pour new asphalt or stripe a stall, ADA compliance should drive your parking lot plan because it’s a legal, safety, and business imperative.
You’re responsible for ensuring people with disabilities can move from car to curb to entrance without barriers.
That means smooth routes, correct slopes, clear markings, and signage placed where drivers and pedestrians can actually use it.
When you prioritize accessibility, you gain legal protection by reducing exposure to complaints, fines, and costly retrofits.
You also lower accident risk, which can reduce insurance claims.
Just as important, you signal that everyone is welcome.
That strengthens your community reputation and supports tenant retention, foot traffic, and positive reviews.
Good design goes beyond minimums.
Lighting, surface changes, and wayfinding make navigation intuitive for all users, including seniors and families.
Build accessibility into your paving scope, budget, and schedule now so you avoid disruptions later and keep the site reliably usable every day.
Determining the Required Number and Types of Accessible Spaces
You’ll start by calculating the minimum number of accessible spaces based on your total parking count.
Next, you’ll confirm how many of those must be van-accessible, meeting width, aisle, and signage standards.
With those numbers set, you can plan striping and layout to meet ADA requirements efficiently.
Calculating Minimum Accessible Spaces
Before you stripe a single stall, confirm how many accessible spaces—and which types—you must provide.
Start by counting all parking spaces in the lot, including employee and overflow areas.
Apply ADA minimums as ratios: as total spaces increase, so does the required number of accessible stalls. Round up any fractions.
Make sure a portion are designated for vans, then allocate the remainder as standard accessible spaces.
Use Data Modeling to forecast needs across phases—new buildings, seasonal peaks, or tenant turnover. Model different counts so you’re never under the threshold.
Set an Audit Frequency—quarterly or semiannual—to recalc after restriping, reconfigurations, or capacity changes.
Document each audit: total spaces, required accessible count, actual count, and stall types.
Local codes may exceed ADA; verify both.
Van-Accessible Space Requirements
With your minimum accessible count set, turn to how many must be van-accessible and what features they require. At least one of every six accessible spaces—and no fewer than one—must be van-accessible.
Each van space needs either a 96-inch-wide stall with a 96-inch access aisle, or a 132-inch stall with a 60-inch aisle. Post an upright “Van Accessible” sign with the International Symbol of Accessibility, clear of snow and bumper overhangs.
Place van spaces on the shortest accessible route to the main entrance, with slopes no steeper than 1:48 in all directions. Maintain smooth connections at aisles and curb ramps.
Verify state or local overlays, enforcement mechanisms, and any required permits. Use community outreach to explain changes, deter misuse, and encourage proper loading-zone etiquette.
Location and Layout Standards for Accessible Parking
You need to place accessible spaces as close as possible to the primary accessible entrances.
From each space, you must provide a continuous, obstruction-free accessible route that connects to sidewalks, ramps, and entries.
Lay out aisles, curb ramps, and crossings so users don’t backtrack or enter traffic unnecessarily.
Proximity to Entrances
Although every site is different, accessible parking must sit on the shortest, most direct accessible route to the accessible entrance.
Place accessible spaces as close as possible to the primary public entry, not a staff door or a seldom-used side entry.
Keep grades gentle and surfaces stable, but focus here on proximity: minimize distance and avoid crossing vehicular paths when you can.
Coordinate entrance landscaping and traffic calming so they guide drivers, protect pedestrians, and don’t block sightlines or door approaches.
- Group accessible spaces nearest the main doors to reduce travel distance and confusion.
- Position passenger loading zones beside these spaces when drop-off is common.
- Locate van-accessible spaces closest to the entrance cluster to prioritize users with larger mobility devices.
Sign clearly and maintain paint.
Accessible Route Design
Designing the accessible route starts at the stall and ends at the door, connecting each accessible space to the entrance without barriers.
You’ll align the access aisle with a curb ramp that’s flush, non-slip, and outside vehicle travel lanes.
Keep slopes gentle: max 1:20 along the path and 1:12 on ramps, with firm, stable surfaces and clear 36-inch minimum width, expanding at passing zones.
Place routes where pedestrians naturally travel and reinforce them with wayfinding cues: contrasting striping, directional arrows, and tactile indicators at crossings.
Verify crosswalks are level at grade changes.
Use lighting design to evenly illuminate the path, ramps, and signage, avoiding glare and shadows.
Keep routes free of obstructions, provide 60-inch turning spaces at doors, and maintain compliant door thresholds.
Surface Slopes, Cross-Slopes, and Drainage Requirements
While pavement strength matters, surface slopes and cross-slopes ultimately determine how accessible and safe a parking lot feels in real use.
You need gentle grades that move water without creating barriers. For ADA compliance, keep running slopes on accessible routes within 5% where possible and limit cross-slopes to 2% so wheelchairs track straight and walkers feel stable.
Direct water away from accessible aisles and landings, never across them.
Design with drainage in mind from the subgrade up.
Pair precise grading with Permeable Pavement where feasible to reduce standing water and icing. Integrate Subsurface Drainage—underdrains, edge drains, or open-graded bases—to keep pavement dry and prevent heaving or ruts that break compliance.
- Verify slopes with field measurements; don’t rely solely on plans.
- Use consistent grade changes at curb ramps so wheels don’t “catch” at grade breaks.
- Maintain catch basins and inlets; clogged systems quickly turn compliant slopes into hazards.
Signage, Markings, and Striping Specifications
Good drainage and gentle slopes only help if people can find and use accessible spaces correctly, so you also need clear, code-compliant signs and pavement markings.
Install the ISA symbol at each accessible stall and the “Van Accessible” plaque where required.
Mount signs so the bottom edge is at least 60 inches above the ground, measured at the front of the space.
Use contrasting striping—typically blue borders with white symbols—and maintain minimum space widths per ADA and local code.
Specify high-visibility paint with reflective coatings to improve nighttime legibility.
Opt for thermoplastic or epoxy systems where traffic is heavy; they last longer than standard latex.
Confirm line widths, symbol sizes, and color standards in your jurisdiction, and document compliance with photos.
Schedule inspections and durability testing annually to catch fading or peeling before citations occur.
Re-stripe on a set cycle, keep sign faces clean and unblocked, and replace damaged posts immediately.
Curb Ramps, Access Aisles, and Routes to Building Entrances
Beyond signs and striping, accessibility depends on how people move from parking to the entrance: curb ramps, access aisles, and continuous, compliant routes.
You need curb ramps at each accessible aisle so wheelchair users never travel behind cars. Keep slopes gentle, junctions flush, and install tactile warnings at ramp bottoms to alert people with low vision. Place ramps within the marked aisle, not in the vehicle path, and avoid lips or ponding.
Accessible routes must be firm, slip‑resistant, and at least 36 inches wide with minimal cross-slope. Remove tripping hazards, provide clear headroom, and make certain intersections are intuitive.
- Verify ramp slopes (1:12 max), flares, and detectable edges where drop-offs occur.
- Keep access aisles level, the full length of the space, and linked directly to the ramp.
- Plan lighting placement to illuminate ramps, aisles, and crosswalks without glare.
Finally, align routes with main entrances so visitors aren’t forced to take a longer path.
Integrating Accessibility Into Maintenance and Restriping Cycles
Because pavement markings fade and lots settle over time, bake ADA checks into every maintenance and restriping cycle so compliance doesn’t slip.
Tie accessibility reviews to your routine tasks: crack sealing, sealcoating, restriping, and sign replacement. Each time you schedule work, verify stall counts, aisle widths, slope tolerances, and sign heights against current ADA standards, not last year’s drawings.
Fold accessibility checks into every maintenance task—verify stalls, aisles, slopes, and sign heights against current ADA standards.
Create a simple checklist and keep it with your maintenance calendar. Include dates for paint inspections, signage audits, and slope spot checks using a digital level. Use Work Orders to document findings and fixes so you can track trends.
Prioritize Staff Training. Teach your team how to measure widths, read slope percentages, and recognize noncompliant layouts. Refresh training annually and after standard updates.
Fold accessibility into Budget Planning. Allocate line items for repainting high-contrast markings, replacing damaged signs, and grinding minor high spots. Small, scheduled corrections cost less—and prevent expensive, reactive overhauls.
Coordinating With Contractors and Inspecting for Compliance

Before you award a paving or striping job, set ADA expectations in writing and make them measurable. Define slope targets, stall counts, aisle widths, curb ramp specs, and sign heights.
During contractor vetting, ask for recent ADA projects, equipment used for measuring slopes, and sample inspection reports. Require a compliance checklist tied to plans, with pass/fail criteria and corrective steps.
Schedule pre-construction, midpoint, and final walkthroughs. Bring a digital level, tape, and camera. Verify slopes (≤1:48 for parking/aisles, ≤1:12 for ramps), landing sizes, detectable warnings, and compliant markings. Don’t sign off until punch-list items are fixed.
- Request submittals: layout drawings, mix designs, stencil specs, signage details, and product data sheets.
- Mandate field tests: slope readings, stripe widths, sign heights, and photo logs for documentation retention.
- Include warranty and re-inspection terms if the lot settles or paint fades.
Archive all records. Strong contracts plus measured inspections protect access—and you.
Frequently Asked Questions
What Are the Penalties and Timelines for Correcting ADA Parking Violations?
Expect civil penalties up to $75,000 for first violations and $150,000 for subsequent ones. Local fines add. Enforcement procedures may require immediate fixes; consent decrees set compliance deadlines, often 30–180 days. You should document progress and communicate proactively.
How Do State or Local Codes Exceed Federal ADA Parking Requirements?
They often exceed federal requirements by mandating Additional Spaces, tighter Slope Limits, larger access aisles, more van-accessible spots, specific signage heights, surface materials, snow removal rules, and stricter maintenance timelines. You should verify city, county, and state codes before designing.
What Documentation Proves Ongoing ADA Compliance During Audits or Lawsuits?
You prove ongoing compliance with signed inspection reports, maintenance logs, work orders, as-built drawings, certified measurements, contractor certifications, training records, policies, timestamps, and photographic evidence documenting slopes, signage, striping, accessible routes, and prompt repairs. Keep records organized, dated, and cross-referenced.
How Should Snow and Ice Management Protect Accessible Spaces and Routes?
You prioritize accessible stalls, aisles, and curb ramps with Priority Clearing, de-icing, and visible signage. You deploy Heated Mats at ramps and entrances, prevent windrow blockages, maintain tactile warnings, document response times, and train crews to avoid piling snow in accessible routes.
What Budget Ranges and Financing Options Exist for ADA Parking Upgrades?
Expect $2,500–$7,500 per stall for striping, signage, aisles, and ramps; full regrade runs $25,000–$150,000. You can mix Funding Sources: capital reserves, grants, tax credits, and Loan Programs like SBA, C-PACE, equipment financing, or short-term lines.
Conclusion
ADA compliance isn’t a checkbox—it’s how you make your site safer, more welcoming, and legally sound. When you pave or restripe, verify the essentials every time: required stall counts (including vans), shortest accessible routes, ≤1:48 slopes for stalls/aisles, properly aligned curb ramps, compliant signage at 60″ minimum height, and high-contrast, durable striping. Bake these checks into your maintenance cycles, document measurements, and hold contractors to written specs so small issues never become costly violations.
If you’d like expert help planning or executing an ADA-compliant layout,All Around Asphalt can handle everything fromcommercial asphalt paving andparking lot paving toasphalt resurfacing,sealcoating, and repairs—all with ADA-focused striping and signage built into the scope.
Ready to get your lot compliant and looking sharp? Call 862-283-9101 or request a walkthrough on ourcontact page. We’ll measure slopes, right-size your accessible stalls, update signage/striping, and provide documentation you can keep on file for audits.