To get a long‑lasting asphalt driveway, you must manage drainage and slope correctly so water sheds away from your home. Strip organics, stabilize weak soils, and build a well‑compacted granular base in thin lifts. Choose a climate‑appropriate asphalt mix and proper thickness, with tight joints and supported edges. Finish with timely sealcoating and routine crack repairs. If you want to go from “basic driveway” to true pavement performance, the next steps will walk you through it.
Key Takeaways
- Design proper drainage with at least 2% slope away from structures, using swales or drains so water never ponds on or under the driveway.
- Excavate organics and weak soils, then stabilize and proof-roll the subgrade to remove soft spots that cause settling and cracking.
- Build the base in thin, well-compacted lifts of quality aggregate, achieving target density before placing any asphalt.
- Choose an asphalt mix suited to local climate and expected traffic, considering polymer-modified binders for added rut and crack resistance.
- Sealcoat on a clean, dry surface at proper temperatures, then inspect and maintain regularly to control cracks, drainage issues, and surface oxidation.
Assessing Site Conditions and Drainage Needs
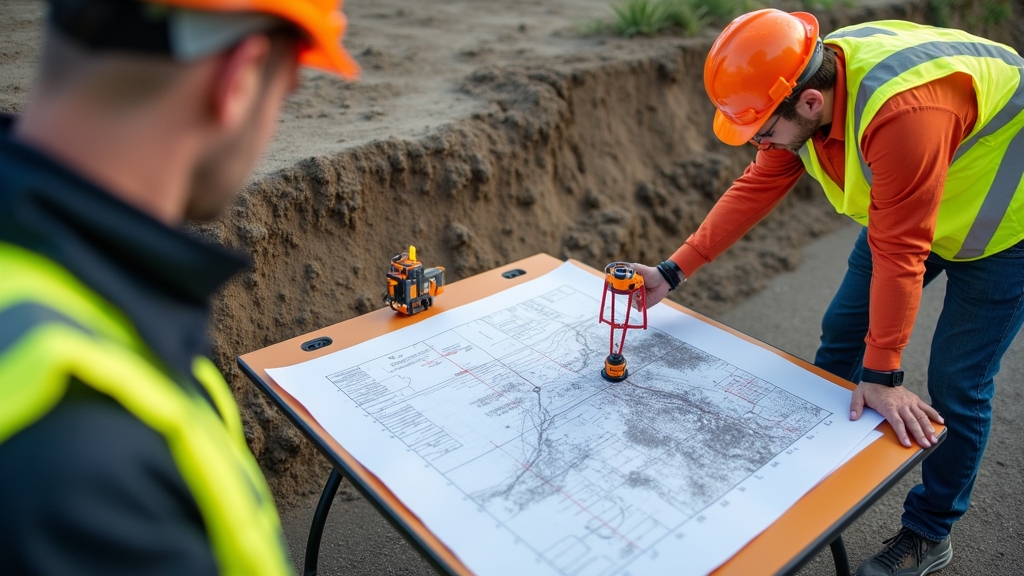
Evaluating site conditions and drainage needs starts with understanding how water will move across and beneath the pavement area.
Proper site and drainage evaluation begins by mapping how surface and subsurface water naturally moves through the pavement area
You first look at the natural slope of the ground and note where water already flows or pools.
Any low spots, dips, or areas near structures signal where you’ll need to direct runoff carefully.
Next, you’ll review local codes and perform a Permit Review to confirm what drainage solutions are allowed, how much runoff you can send to the street, and whether you must include features like swales or catch basins.
At the same time, use Utility Mapping to locate underground lines so you don’t place drains, trenches, or outfalls where they’ll conflict with pipes, cables, or septic systems.
You then determine appropriate slopes for the driveway surface, ensuring water sheds away from buildings and doesn’t collect along edges, joints, or grade changes.
Preparing a Stable Subgrade for Paving
Once you understand how water will move across the site, you’re ready to build a subgrade that can support the pavement without shifting, settling, or trapping moisture. You start by stripping away soft topsoil, organic debris, and buried stumps. Thorough Root Removal matters; leftover roots decay, leaving voids that cause cracking and dips in your driveway.
Next, you evaluate the existing soil. Clay, silt, and sandy soils each behave differently under load and when wet, so you identify what you’re working with and adjust your approach. Perform Contamination Testing if you suspect spilled oil, chemicals, or construction debris; contaminated pockets weaken the structure and must be excavated and replaced.
Use this quick guide as you inspect:
| Subgrade Issue | What You’ll See | What You Should Do |
| Organic material | Dark, spongy soil, roots | Remove and replace |
| Soft, pumping spots | Water and mud under foot | Dry out, improve drainage |
| Debris/contaminants | Rubble, stains, odor | Excavate, test, backfill |
Building a Strong, Well-Compacted Base Layer
You can’t build a durable asphalt surface without first creating a strong, well-compacted base layer over your prepared subgrade.
In this section, you’ll see how proper subgrade preparation sets the stage for a base that resists settling, moisture, and rutting.
You’ll also learn which compaction techniques and equipment to use so your base achieves the density and stability your asphalt needs.
Proper Subgrade Preparation
Before any hot mix touches the ground, proper subgrade preparation determines whether your asphalt pavement will stay smooth and stable or crack and rut prematurely.
You’re not just shaping dirt; you’re creating the structural platform that carries all traffic loads.
Start by confirming permit acquisition and regulatory compliance so your project meets local standards and drainage rules.
Then focus on the soil itself:
- Evaluate soil conditions – Identify native soil type, moisture levels, and weak spots.
- Strip and proof-roll – Remove topsoil, roots, and soft material; test for pumping or deflection.
- Shape for drainage – Grade slopes so water flows away from the driveway.
- Stabilize weak areas – Use geotextiles, lime, cement, or additional aggregate where soils are soft or expansive.
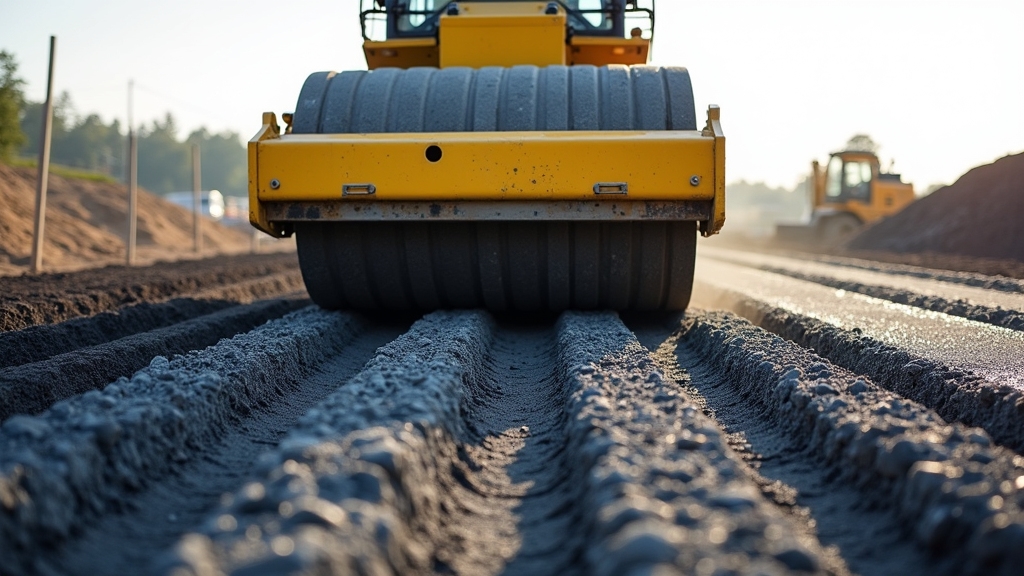
Compaction Techniques and Equipment
Packing the base layer to the right density turns loose rock into a solid platform that supports your asphalt for decades.
You achieve this with the right combination of equipment and methodical passes.
For most driveways, contractors use vibratory plate compactors, small tandem rollers, or ride-on trench rollers for tight areas.
You want uniform compaction in thin layers, called lifts, typically 3–6 inches thick.
Each lift gets compacted before the next is added, preventing hidden soft spots.
Moisture control also matters: too dry and the base won’t lock; too wet and it pumps under the roller.
Proper operator training guarantees machines run at correct speed, frequency, and overlap.
Strict safety protocols protect workers and homeowners around vibrating, moving equipment.
Choosing the Right Asphalt Mix for Your Driveway
Selecting the right asphalt mix for your driveway means balancing performance, cost, and appearance for your specific conditions.
You’ll choose from several mix types, each designed for different stresses and environments, so it’s smart to match the material to how you actually use your driveway.
Consider these key factors:
1. Climate Compatibility
Your local temperatures, freeze–thaw cycles, and rainfall patterns should guide the mix design.
Ask for formulations tested for your region.
2. Polymer Modifiers
Polymer-modified asphalts resist rutting, cracking, and fuel spills better than standard mixes. They usually cost more but offer longer service life.
3. Aggregate Size and Gradation
Finer mixes create smoother, quieter surfaces; coarser mixes handle heavier loads and minor base movement better.
4. Traffic and Use Patterns
Daily vehicle weight, turning movements, and parking habits dictate how stiff and durable the mix should be. Share these details with your contractor.
Establishing Proper Thickness and Layering
Although choosing the right mix matters, your driveway’s performance ultimately depends on how thick each asphalt layer is and how well those layers work together. You’ll want your contractor to follow local Thickness Standards, which typically specify separate minimums for the base course and the surface course.
These standards reflect expected traffic, soil conditions, and climate, so they’re your first safeguard against premature cracking and rutting.
Equally important is proper Layer Sequencing. A typical driveway starts with a compacted subgrade, then a granular base, followed by a thicker structural asphalt base course, and finally a thinner, tighter surface course.
Each layer should be placed only after the previous one is stable and correctly graded. If any layer is too thin, it can’t spread loads; if it’s too thick, it may cool unevenly and become weak. Ask your contractor to explain their thickness plan before work begins.
Achieving Optimal Compaction and Smoothness
Once the thickness and layers are right, the real test comes when the rollers go to work.
Compaction presses the hot asphalt mix together, locking aggregates in place and squeezing out air voids. You want enough pressure and passes to reach target density, but not so much that you crush the aggregate or shove the mat.
To guide your contractor, focus on four essentials:
- Roller sequence – Use breakdown, intermediate, and finish rollers in the right order while the mix is still workable.
- Rolling pattern – Overlap each pass consistently to avoid soft spots and ripples in surface texture.
- Temperature window – Compact while the asphalt’s hot enough to move but firm enough to hold shape.
- Smoothness checks – Use straightedges or string lines to confirm finish tolerances, catching dips and high spots before the mix cools.
Done correctly, you’ll get a dense, smooth driveway that resists damage.
Managing Joints, Edges, and Transitions
While compaction determines how strong your driveway will be, joints, edges, and junctions decide how long it’ll stay that way. You want every meeting point—new to old asphalt, asphalt to concrete, or pavement to soil—to act as a single, solid surface, not a line of weakness.
Plan each joint so it’s straight, well‑aligned, and cut clean before you place new mix against it. Hot‑to‑hot joints bond best, so insist your crew staggers and closes lanes quickly.
Use edge reinforcement wherever asphalt meets softer materials. Concrete curbs, soldier‑course pavers, or pinned edge restraints keep the mat from unraveling and cracking outward.
For driveways tying into garages, sidewalks, or streets, careful interface detailing prevents bumps and trip points.
| Area | Risk if Ignored | Good Practice |
| Longitudinal | Centerline cracking | Tight joint, proper overlap |
| Transverse | Reflective cracks | Square cuts, hot bonding |
| Edges | Raveling, breakup | Edge reinforcement, proper compaction |
Incorporating Effective Drainage and Slope Design
Strong joints and edges only matter if water doesn’t sit on or under your new asphalt.
You need a driveway that quickly moves water away from the surface and foundation.
That starts with planning slope, drainage paths, and how your paved area ties into your yard.
Design your drainage and slope with these priorities:
1. Set proper slope
Aim for about 2% fall (¼ inch per foot) away from your house and garage so water runs off instead of pooling.
2. Control flow paths
Use swales, gutters, or trench drains to collect runoff and steer it toward safe discharge areas.
3. Landscape Integration
Blend grading with plant beds, rain gardens, or gravel areas that accept and slow runoff rather than erode.
4. Stormwater Harvesting
Direct runoff into cisterns or barrels, then reuse it for irrigation, reducing puddles and pressure on municipal systems.
Applying Sealcoats and Protective Surface Treatments
When you apply sealcoats and protective surface treatments correctly, you extend pavement life, improve appearance, and cut long-term repair costs.
You’ll need to choose the right sealcoat materials for your traffic load, climate, and budget so the surface performs as intended.
You also must time the application carefully and follow proven tips on surface prep, weather conditions, and curing to get a durable, even finish.
Benefits of Sealcoating
Extending the life of asphalt often starts with a simple step: applying a quality sealcoat.
When you sealcoat your driveway, you shield the pavement from sunlight, water, and everyday wear. Sealcoating adds UV protection that slows fading and surface drying, and it improves chemical resistance against oil, gas, and de-icing fluids that can soften and break down asphalt.
You also gain a smoother, richer-looking surface that’s easier to sweep, clean, and maintain. Overall, sealcoating supports long-term durability and helps you avoid premature replacement.
Here’s how sealcoating benefits your driveway:
- Reduces oxidation and weather damage.
- Increases resistance to spills and stains.
- Limits small cracks from spreading.
- Enhances curb appeal while lowering life-cycle costs.
Choosing Sealcoat Materials
To get those benefits from sealcoating, you need the right material for your driveway and climate.
Start by choosing between coal tar, asphalt emulsion, and newer polymer‑modified blends.
Coal tar offers strong chemical resistance but often has higher VOC content and stronger odor.
Asphalt emulsions are more environmentally friendly, with lower fumes and easier cleanup.
Look closely at UV resistance.
In sunny regions, a sealcoat with strong UV resistance slows oxidation, fading, and surface brittling.
If you use de‑icing salts or park leaky vehicles, prioritize chemical and oil resistance as well.
Check the product data sheet for solids content (for film thickness), curing requirements, and recommended number of coats.
Match the sealcoat’s performance rating to your driveway’s traffic level and local weather extremes.
Application Timing and Tips
Although the right material matters, you’ll only get a durable finish if you apply sealcoat under proper conditions and with good technique.
You need dry pavement, moderate temperatures, and no rain in the forecast.
Careful Weather Monitoring helps you avoid washed‑out sealer, poor bonding, and uneven curing.
Plan the job so your driveway is clean, repaired, and completely dry before application.
Good Crew Coordination keeps edges straight, coverage consistent, and overlaps minimal.
- Confirm a 24–48 hour window without rain and with temperatures above manufacturer minimums.
- Block off the driveway to prevent vehicles and pets from tracking through wet sealer.
- Apply thin, even coats rather than one thick layer.
- Respect curing times before driving or parking.
Maintenance Practices That Extend Driveway Lifespan
Adopting a few simple maintenance habits turns an asphalt driveway from a short-term surface into a long-lasting investment.
Start with Routine Inspections: walk your driveway every few months and after harsh weather. Look for early signs of wear, such as small fractures, standing water, or fading lines. This regular Crack Monitoring lets you catch minor issues before they spread and weaken the base.
Clean the surface often. Sweep away gravel and debris that grind into the asphalt, and remove oil or chemical spills quickly so they don’t soften the binder. Rinse with a garden hose to keep dust and residue from building up.
Sealcoat the driveway every few years, or as your paving professional recommends. Sealcoating protects against UV rays, water penetration, and automotive fluids.
Finally, avoid parking heavy equipment in the same spot for long periods, and keep edges supported so they don’t crumble under pressure.
Frequently Asked Questions
How Does Asphalt Paving Cost Compare to Concrete or Paver Driveways?
Asphalt usually costs less than concrete or pavers because material pricing’s lower and labor estimates are cheaper. You’ll pay more for decorative options, but you still generally spend less upfront than with concrete slabs or individual paver installations.
Can I Pave Over an Existing Gravel or Dirt Driveway Without Full Reconstruction?
You usually can, but you must properly stabilize the surface first. You’ll add and compact aggregate, perform thorough base compaction, and do a careful drainage evaluation. Skipping those steps leads to rutting, cracking, and premature asphalt failure.
What Time of Year Is Best for Installing a New Asphalt Driveway?
You’ll get the best results installing asphalt in late spring through early fall, when temperatures stay consistently warm. Use longer weather windows for proper curing and plan installation scheduling to avoid rain, nighttime freezes, and extreme heat.
How Long Should I Keep Vehicles off a Newly Paved Asphalt Driveway?
You should keep vehicles off a newly paved asphalt driveway for 3–7 days. During this curing period, apply strict traffic restrictions, avoid sharp turns, don’t park in the same spots, and follow your contractor’s specific guidance.
Are Eco-Friendly or Recycled Asphalt Options Available for Residential Driveways?
Yes, you’ve got eco-friendly options. You can choose recycled asphalt, which reuses old pavement, or porous pavement, which lets water drain through, reducing runoff. Ask contractors about local availability, pricing, and long-term performance.
Final Thoughts
When you follow these asphalt paving techniques, you give your driveway the strength and durability it needs to last. By preparing a solid subgrade, choosing the right asphalt mix, and managing thickness, joints, and drainage, you’ll prevent many common problems before they start. Finish with proper sealcoating and regular crack repair, and you won’t just have a driveway that looks great—you’ll have one that performs and protects your property for years.
At All Around Asphalt, these techniques are the foundation of every residential paving project we complete. From stabilizing soft soils to finishing with a durable surface treatment, we bring the right tools, crew, and expertise to deliver results built to last.
Want to learn more about how we approach long-lasting asphalt solutions? Visit our About Us page or reach out through our Contact form to request a quote.